CCR Pod NEREO Manual
Welcome to the short manual for the CCR Pod NEREO.
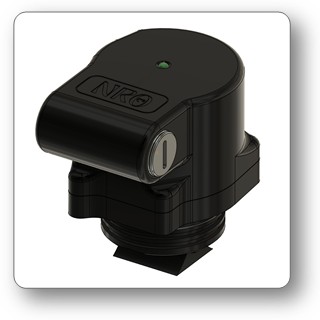
This device enables a wireless connection to a rebreather and a SYMBIOS Dive Computer. It can connect to up to 3 O2 sensors. Those O2 sensors may be either galvanic O2 sensors with a nominal output voltage of 8-15mV @ 0.21 bar pO2 or a GREENFLASH po2 sensor in analog mode.
Specifications
- Battery: CR123
- Size: 90 mm length, 40 mm diameter
- Weight: ~110 g
- Frequency: 125kHz
- transmission range: up to 90cm
- transmission method: magnetic
- transmission interval O2 sensor mV: once per second
- transmission interval battery voltage: ~ once each 30
Power Management
The Device is powered by a CR123 Li Ion Battery. This enable operation for up to 200 diving hours and up to more than 1 year in standby. - the device starts transmitting mV data, as soon as it detects a signal change on sensor 1 or sensor 2. - the device enters sleep mode, when the pO2 in front of the sensors is stable for more than 15 minutes (the sensor signal has to be within +-1mV). - if you are using a GFREENFLASH sensor, connect it to the input for sensor 3, as the GREENFLASH sensor might prevent the device from entering sleep mode.
Once each 30s, the device is transmitting also the battery voltage. The dive comptuer displays the battery voltage with a battery symbols:
- 4 bars: >2800 mV
- 3 bars: >2730 mV
- 2 bars: >2650 mV
- 1 bar: >2600 mV
Additioally, a pop up warning will notify the user, when the battery voltage of the POD falls below 2650 mV.
Connecting sensors
Up to 3 pO2 sensors with analog output can be connected to the device. If you use a GREENFLASH pO2 sensor, connect it to the input for sensor 3.
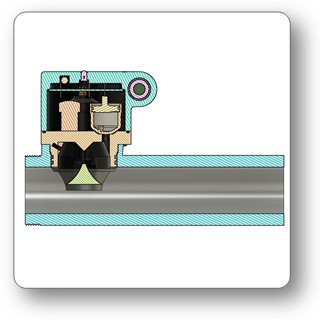
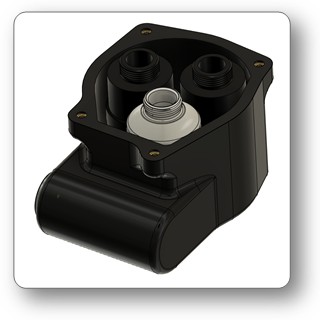
Installing Sensors
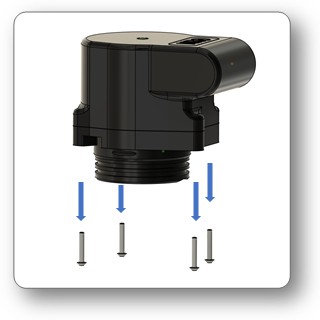
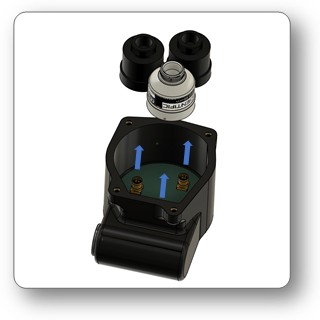
Remove the screws
Insert sensors
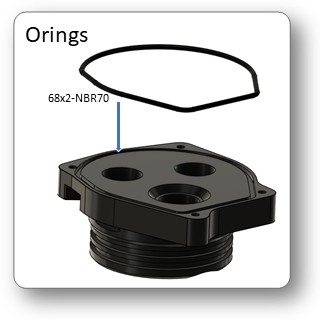
Check and lubricate O-ring
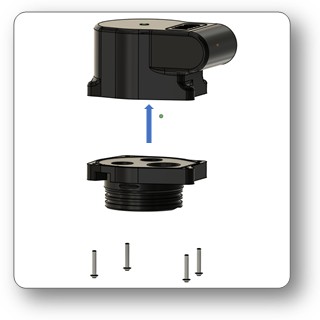
Close the device
Battery Exchange
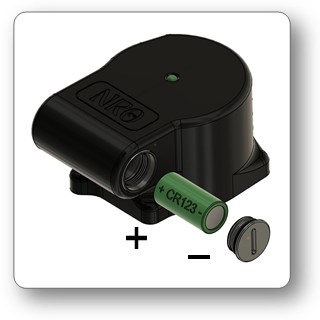
The device uses a CR123 battery. - Open the lid with a coin - Exchange the battery - Check and lubricate the O-ring with silicon grease - Close the lid
Preparation
- Read the manual of the dive computer and get familiar with its operation.
- Switch the dive computer to CCR mode:
➔menu➔SETTINGS➔DIVE MODE➔CCR MODE - Activate the device
- Pair the device:
➔menu➔SETTINGS➔PAIRING➔CCR INTERFACE - Set the correct fraction of the calibration gas:
➔menu➔SETTINGS➔CCR SETTINGS➔FO2 CAL GAS - Flush the sensors with calibration gas.
- Enter the calibration menu:
➔menu➔SETTINGS➔CCR SETTINGS➔CALIBRATE CCR - Confirm the mV readings by a long press of button A.
A calibration is accepted when the output of the sensors is between 38 and 80mV @1bar pO2.
If you use less than 3 sensors, disable the sensor that are not used:
Only enabled sensors are used for pO2 warnings, decompression and CNS calculation.
Diving
The average of the enabled pO2 sensors is used to calculate tissue on/off gassing, decompression schedule and TTS forecast and CNS%. TTS and deco stop forecast is based on the current loop pO2. The claculated loop pO2 is the average of all enabled sensors, as long as the sensors are within 20% of the average. Otherwise, the lowest pO2 value is used for decompression and the highest for CNS% calculation.
Warnings
Warning pop ups and vibration alarms inform the diver about dangerous situations, like too high or too low pO2. Warnings can be confirmed by pressing both buttons long.
Bailout mode
By pressing button B long, one can toggle between CCR mode and Open Circuit bailout mode. In Open Circuit bailout mode, the first activated gas is the currently selected diluent gas.
Toubleshooting
Pairing not possible
- activate the wireless screen (setting ALL) to see if the transmitter is sending data
- activate the transmitter
- check the battery voltage / replace battery
Calibration failed
- check the sensors
- disable sensor channels that are not used
- check the setting of the fraction of the calibration gas